Overview
This guide walks through creating and registering a new Document Type — the foundational step for teaching the AI how to extract data from your specific documents.
Time Required
10–15 minutes to create and register your first Document Type.
Step 1: Navigate to the Document Type Manager
- From the main dashboard, hover over Data Hub in the top navigation bar.
- In the dropdown, under Document Manager, click Document Type.
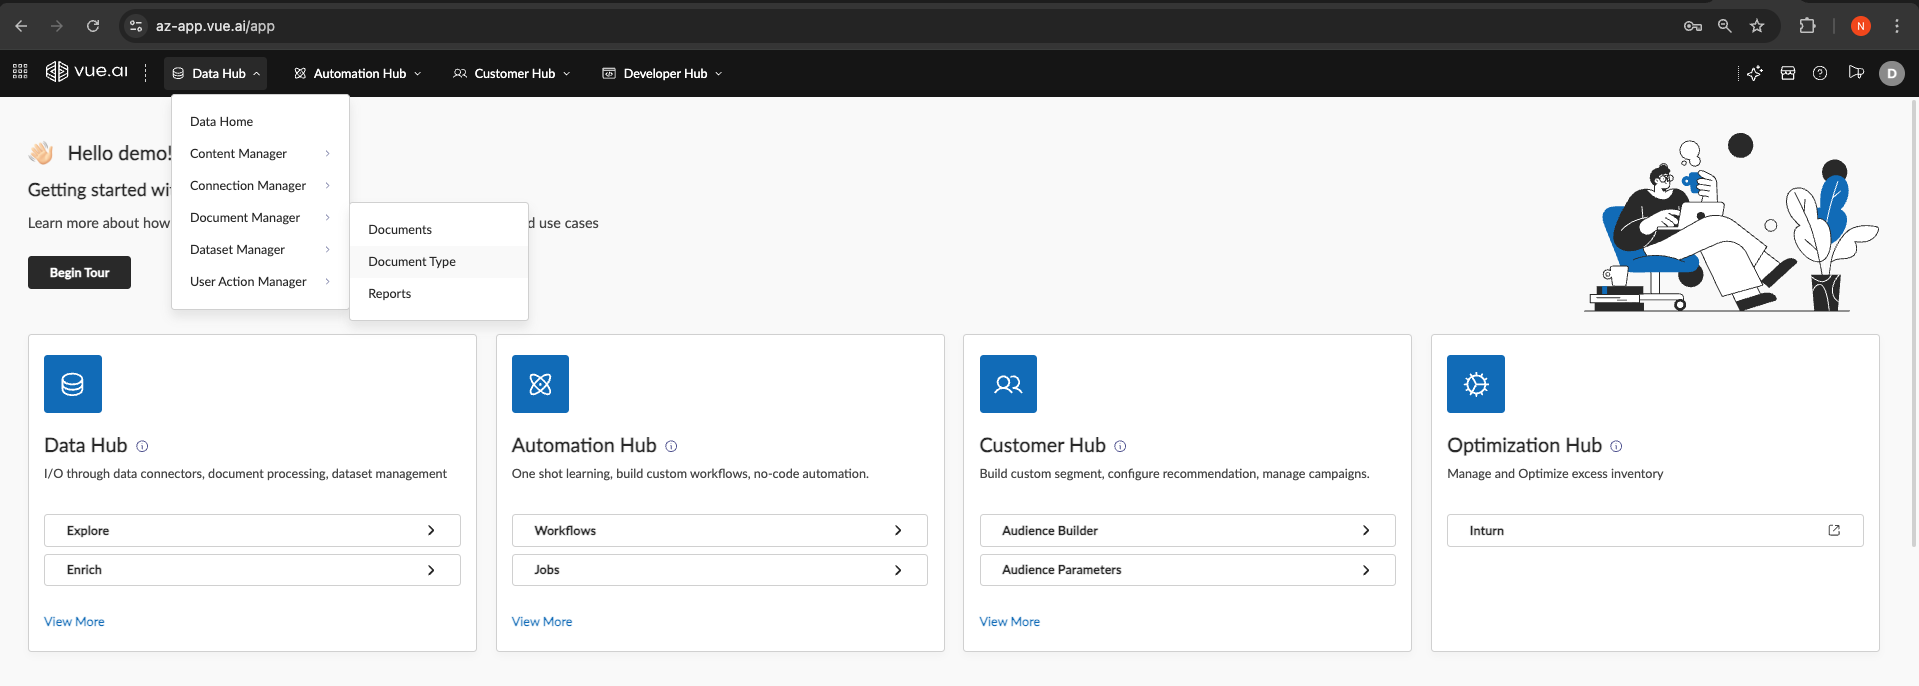
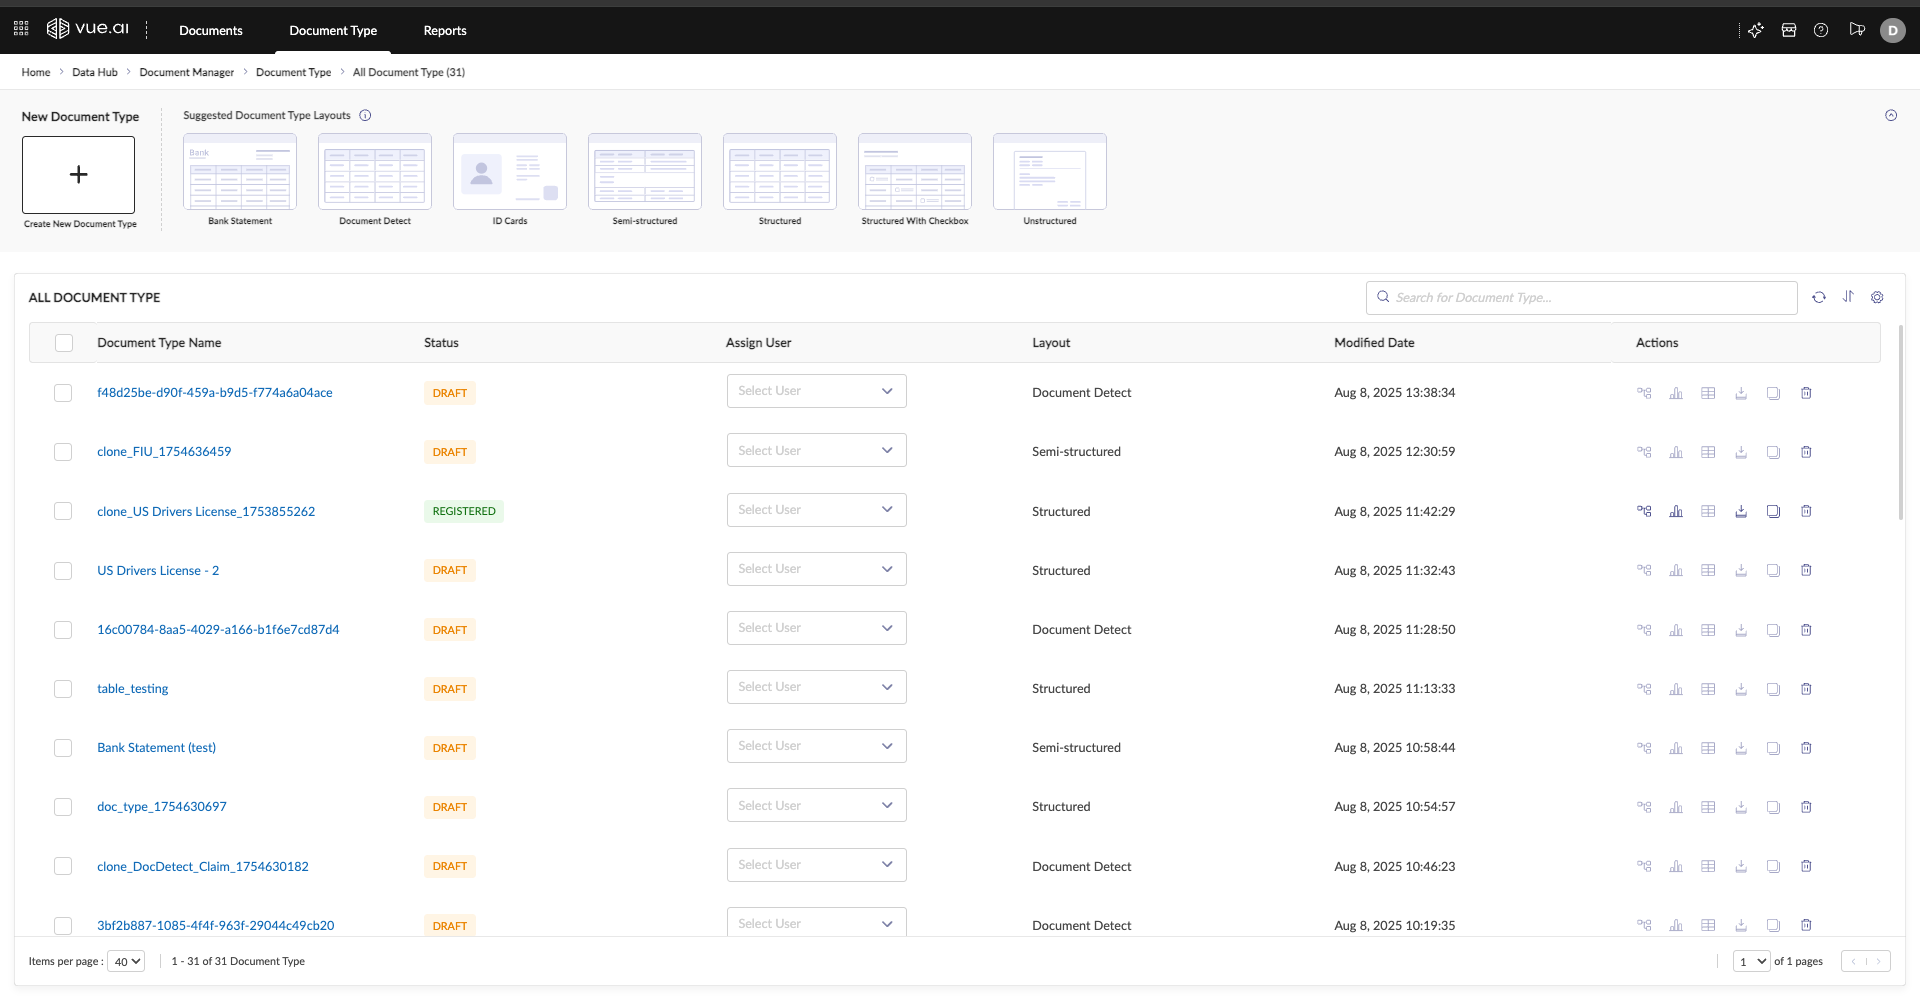
This opens the "All Document Type" page listing existing types.
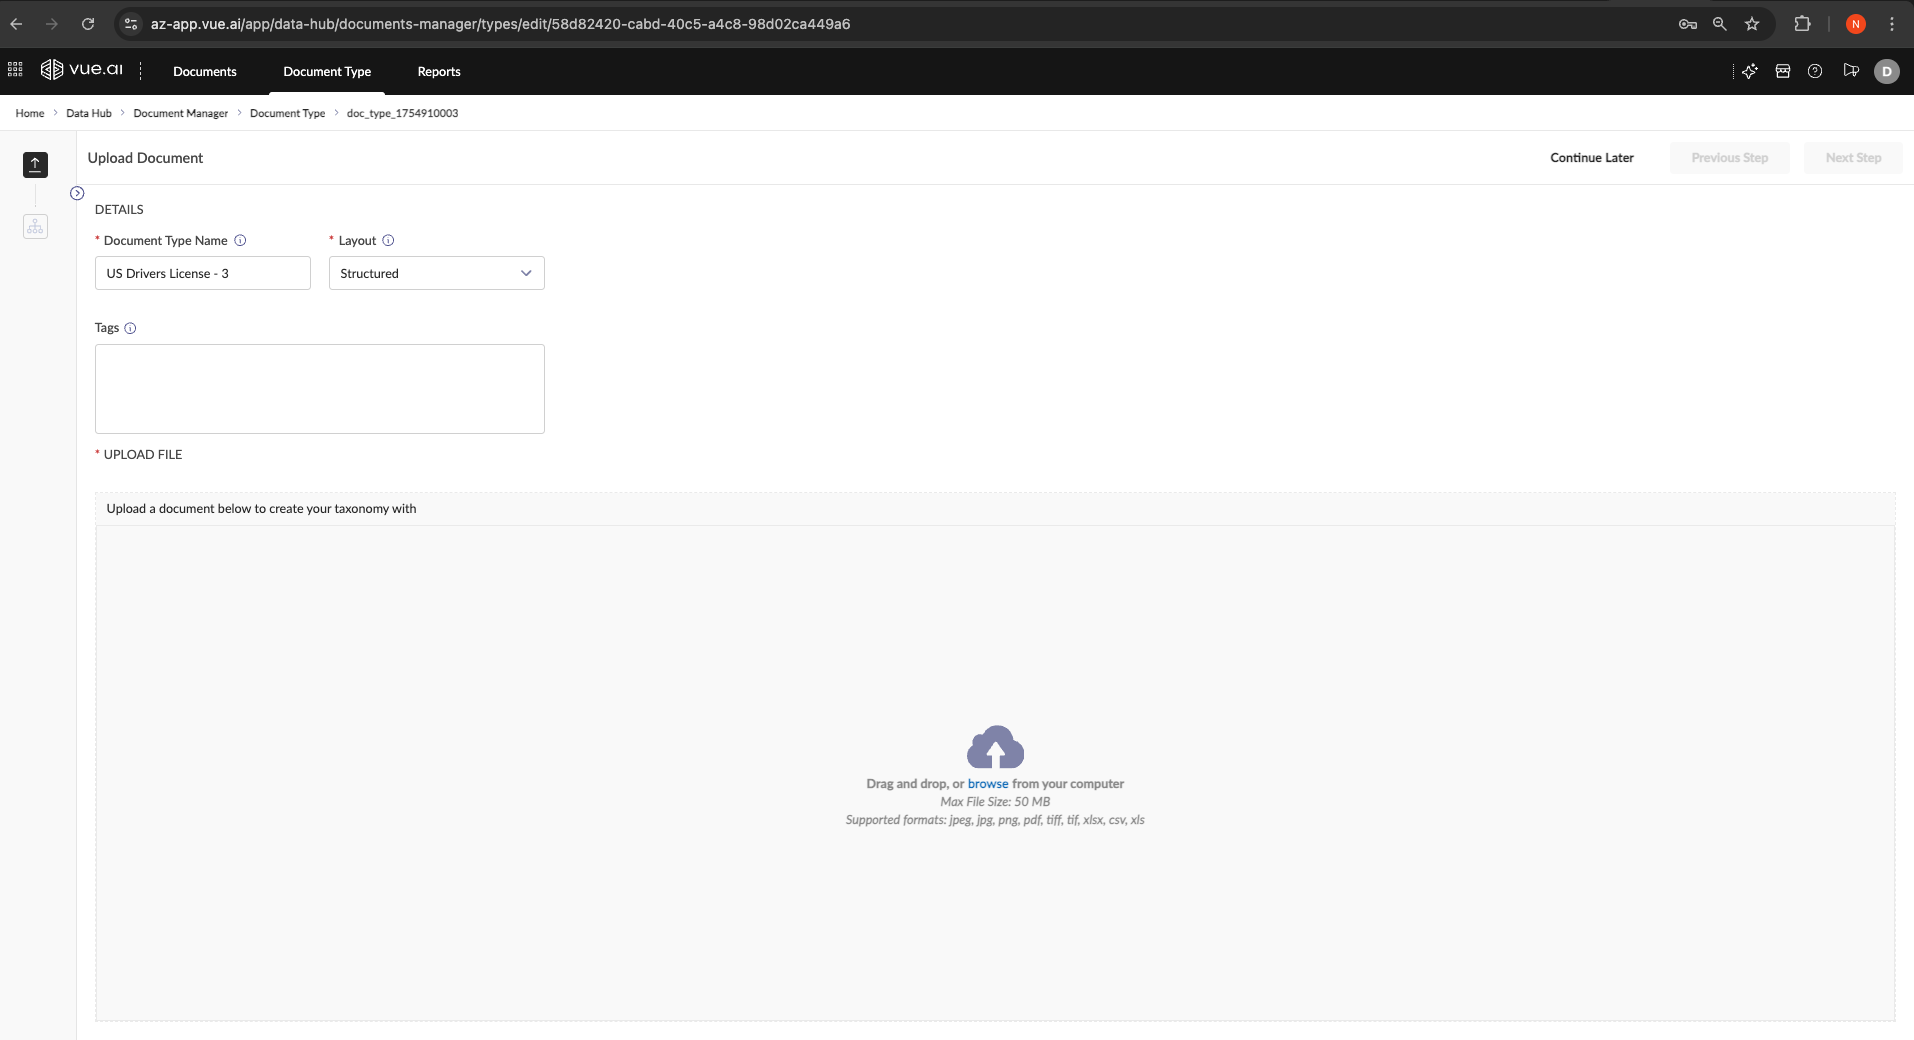
Step 2: Create and Configure the New Document Type
- Click + Create New Document Type.
- On the "Upload Document" screen, fill in:
- Document Type Name: Clear, unique name (e.g.,
US Drivers License - CA). - Layout: Choose the best fit (e.g.,
Structured). - Tags (Optional): Add tags for organization.
- Document Type Name: Clear, unique name (e.g.,
- In the "UPLOAD FILE" section, drag-and-drop or browse to upload an example document.
- Click Next Step.
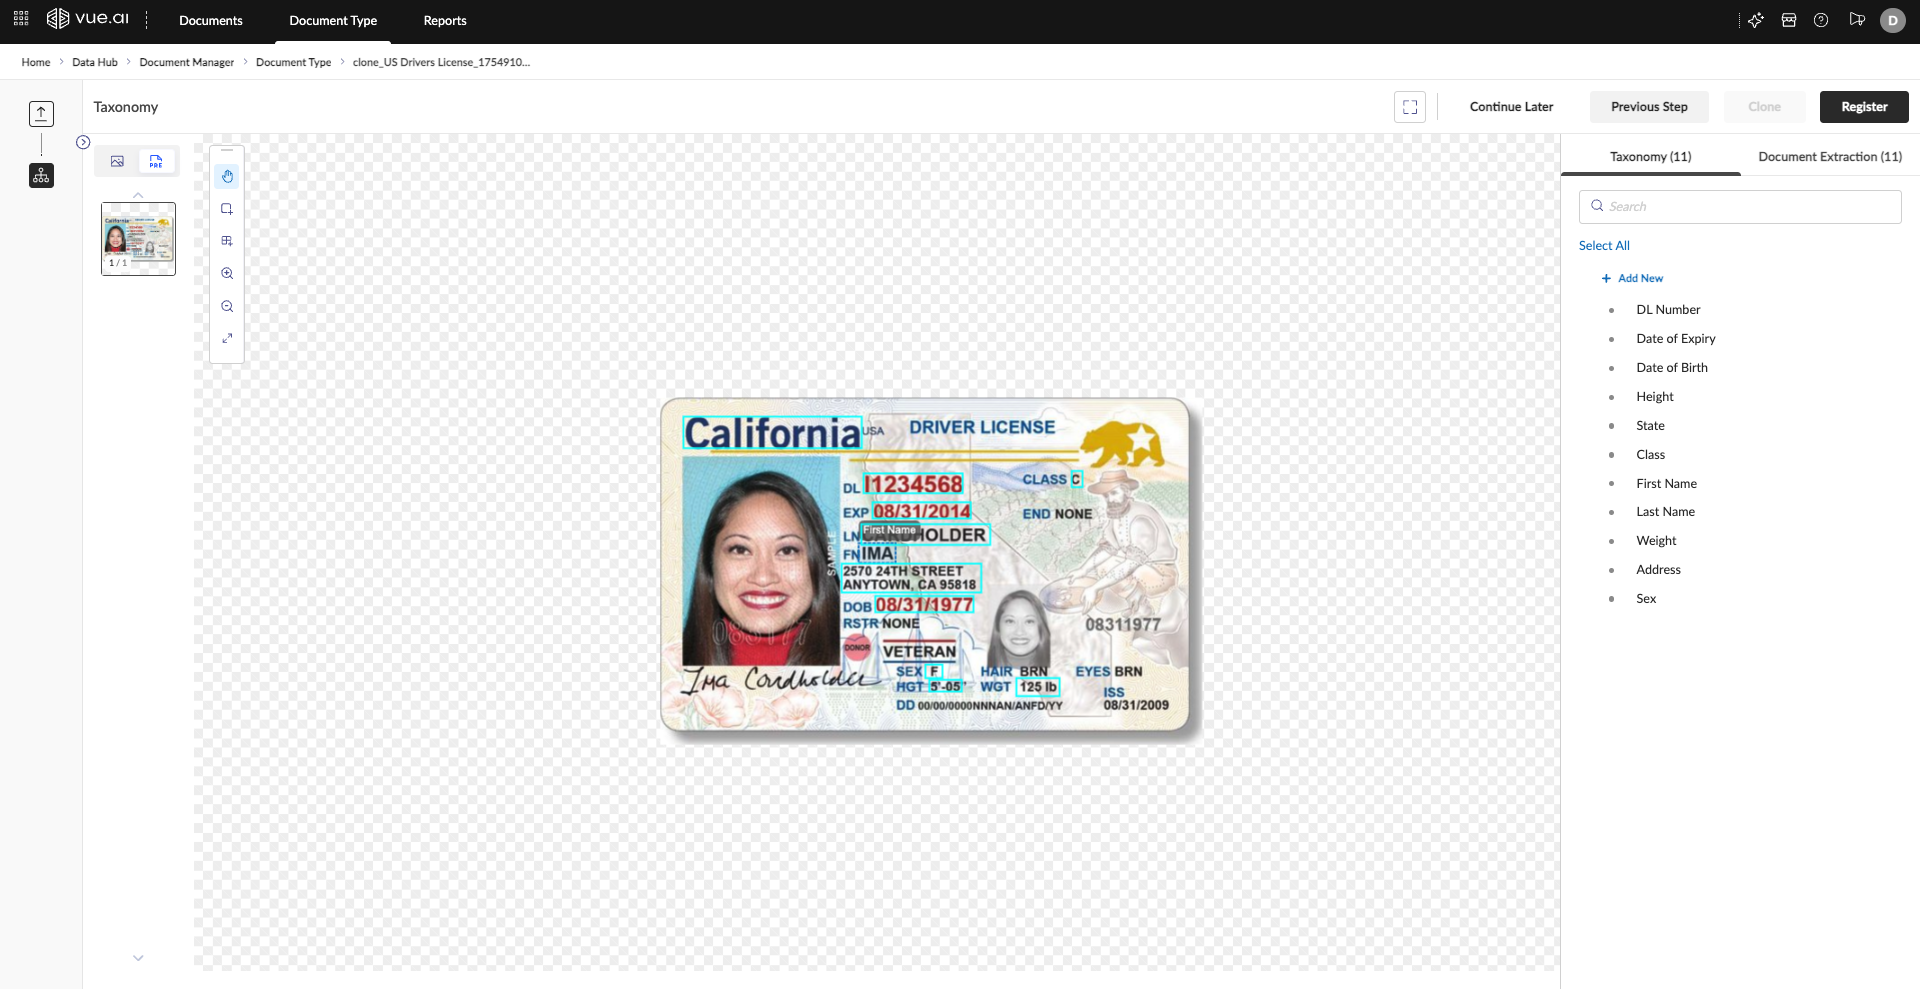
Step 3: Review the Initial (0‑Shot) Extraction
After upload, you land in the annotation interface. The system automatically performs a 0-shot extraction — an initial attempt to identify and extract data with no prior training.
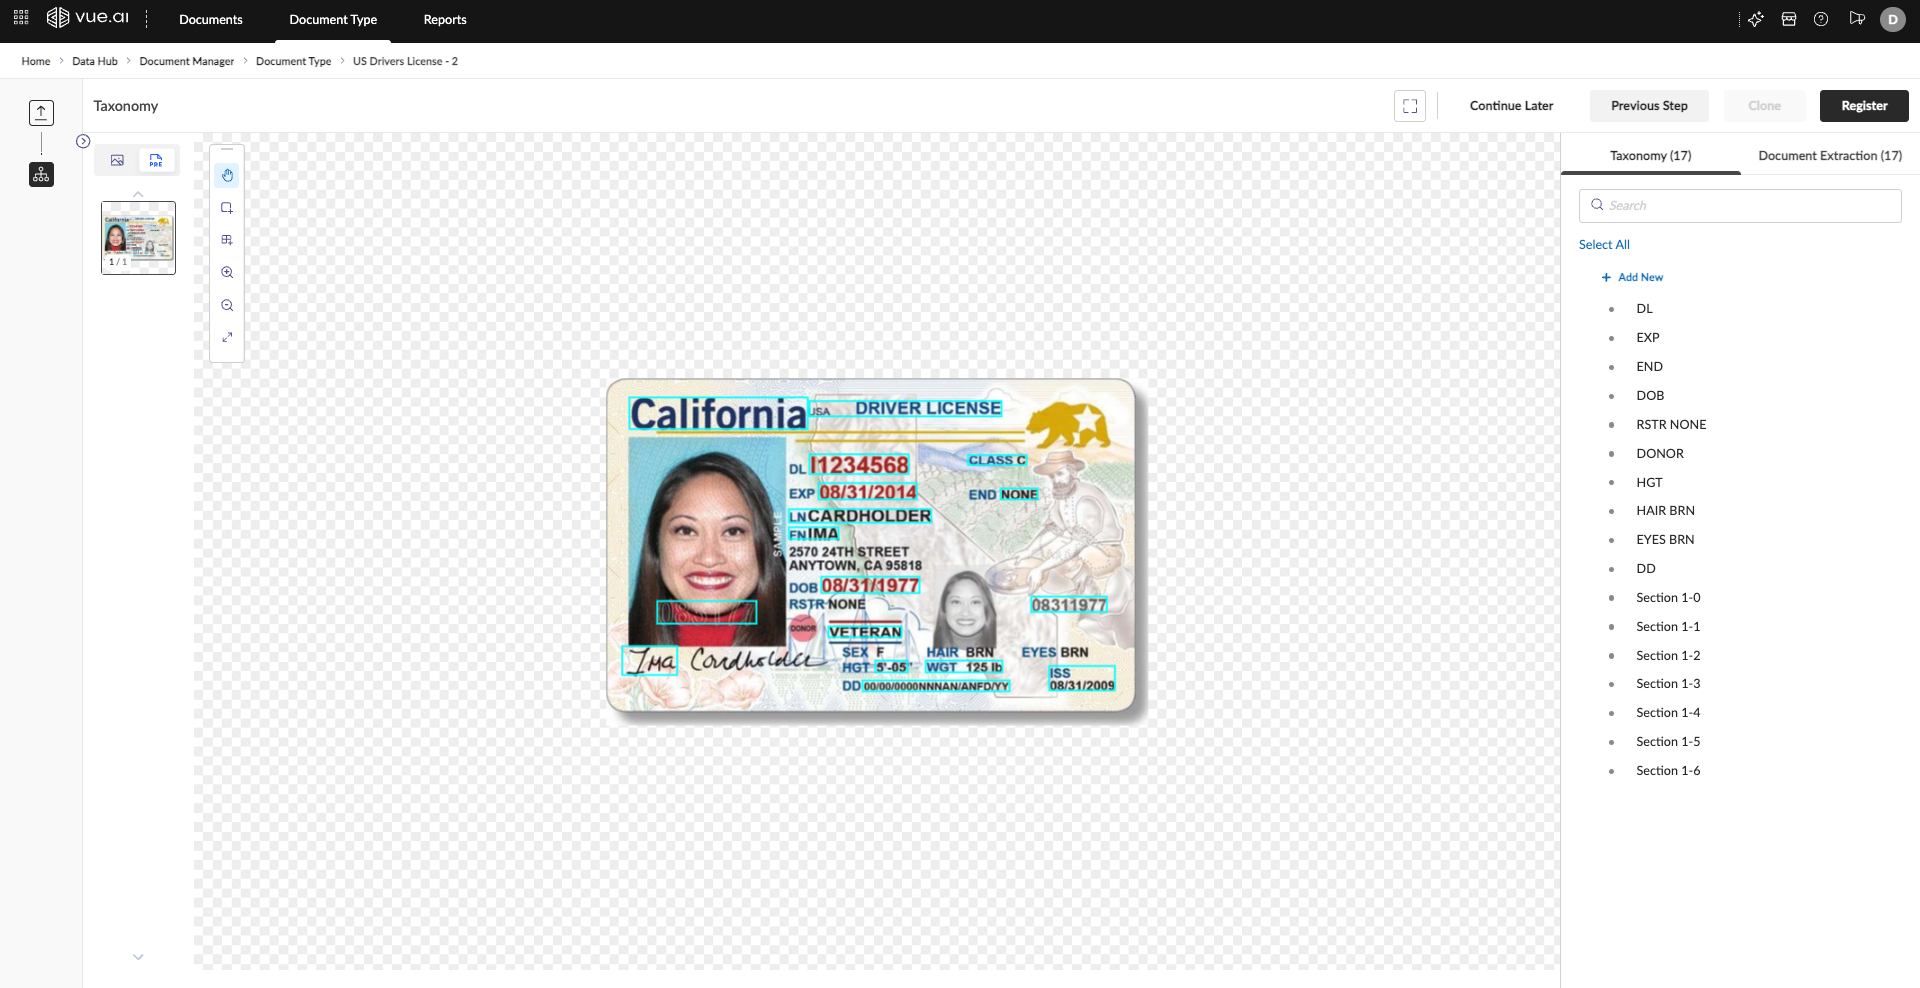
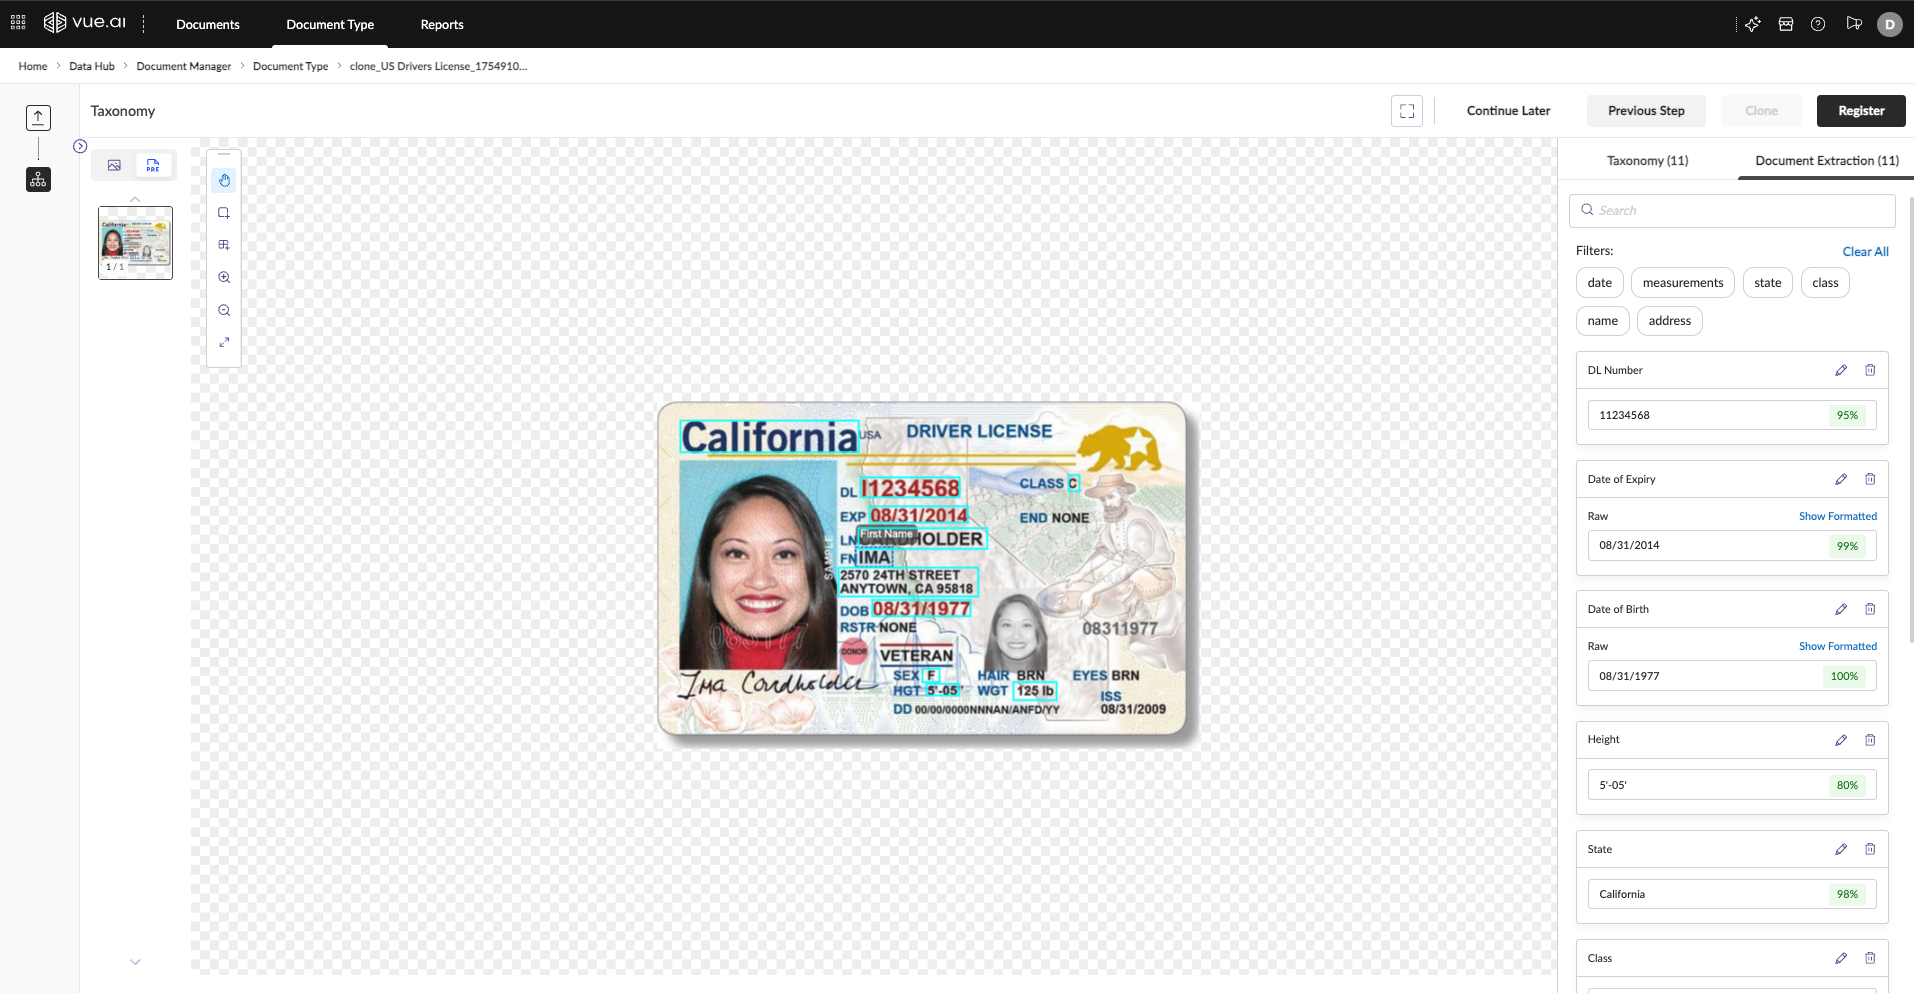
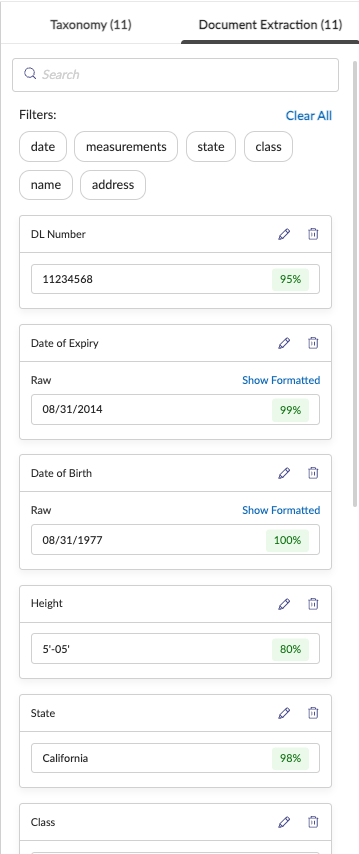
On the right, two tabs present the results:
| Taxonomy (Field Names) | Document Extraction (Field Values) |
|---|---|
The Taxonomy tab lists attribute names the AI believes are present — your starting schema. | The Document Extraction tab shows extracted values with confidence scores. |
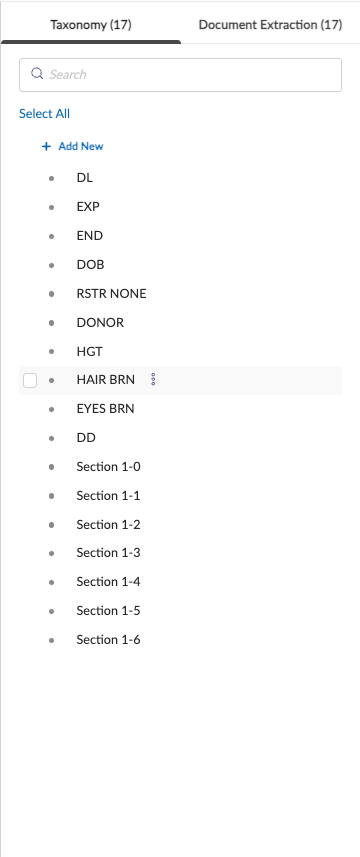 | 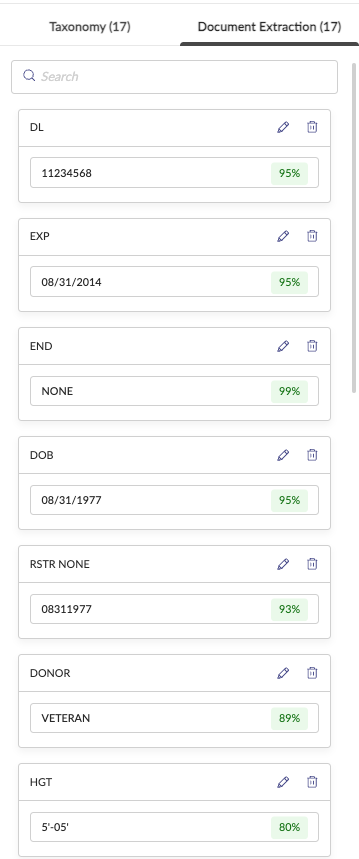 |
Refine this into a clean, reusable taxonomy.
Step 4: Refine the Taxonomy
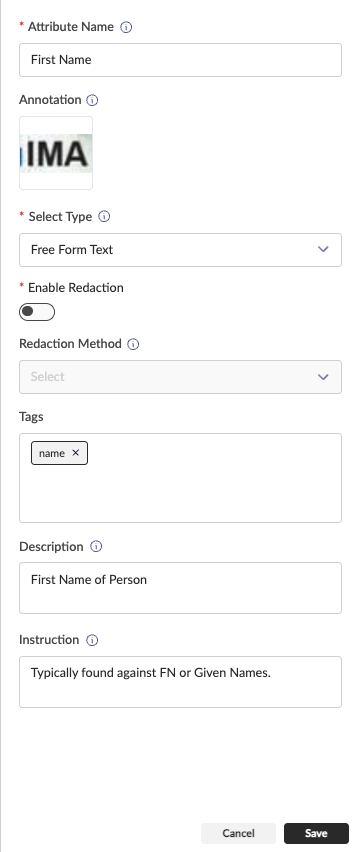
Editing Standard Attributes
- Click an attribute in the list to open its configuration panel.
- Define properties:
- Attribute Name: Use a friendly, unique name (e.g.,
Date of Birth). - Annotation: Adjust the bounding box on the document image as needed.
- Select Type: Choose the correct datatype (e.g.,
Date,Free Form Text). - Description / Instruction: Provide context for the model and reviewers.
- Attribute Name: Use a friendly, unique name (e.g.,
- Click Save.
| Date attribute | Free-form text attribute |
|---|---|
 |  |
Configuring Table Attributes
- For a
Tableattribute, first set approximateColumnsandRows. Draw a bounding box around the entire table.
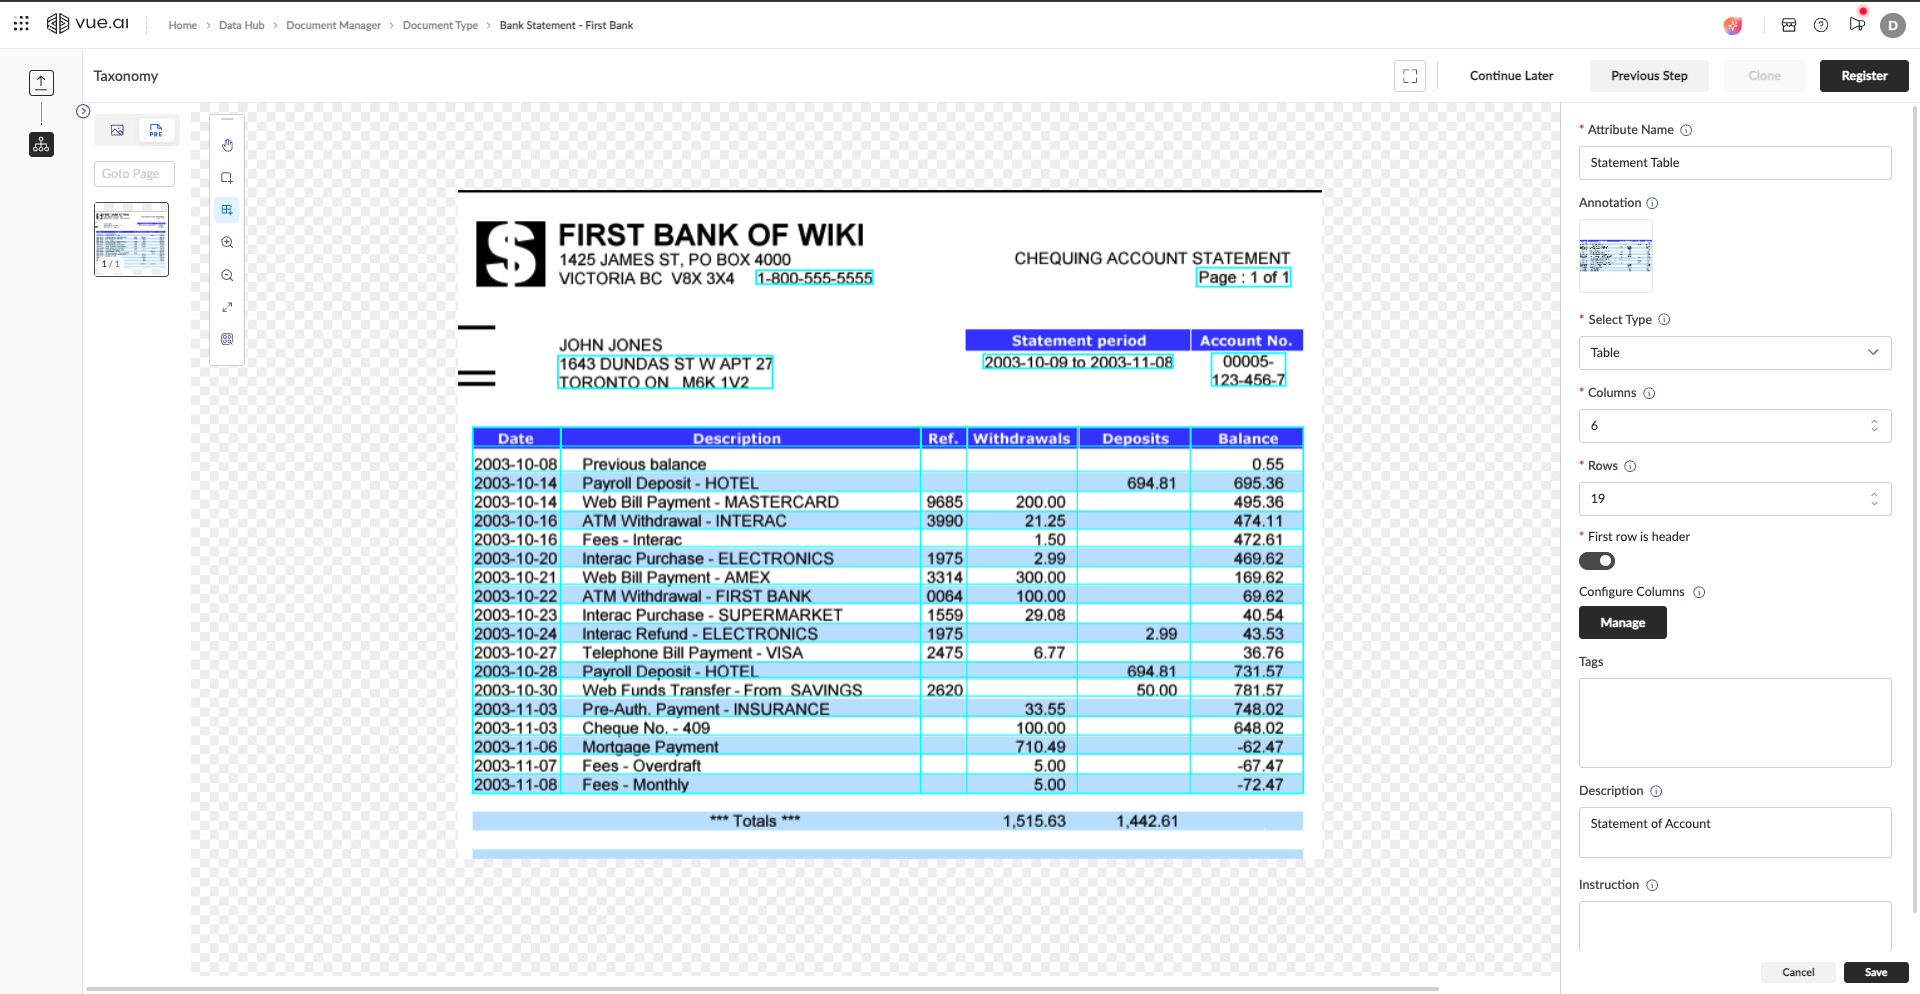
- Click Manage under "Configure Columns" to define the internal schema.
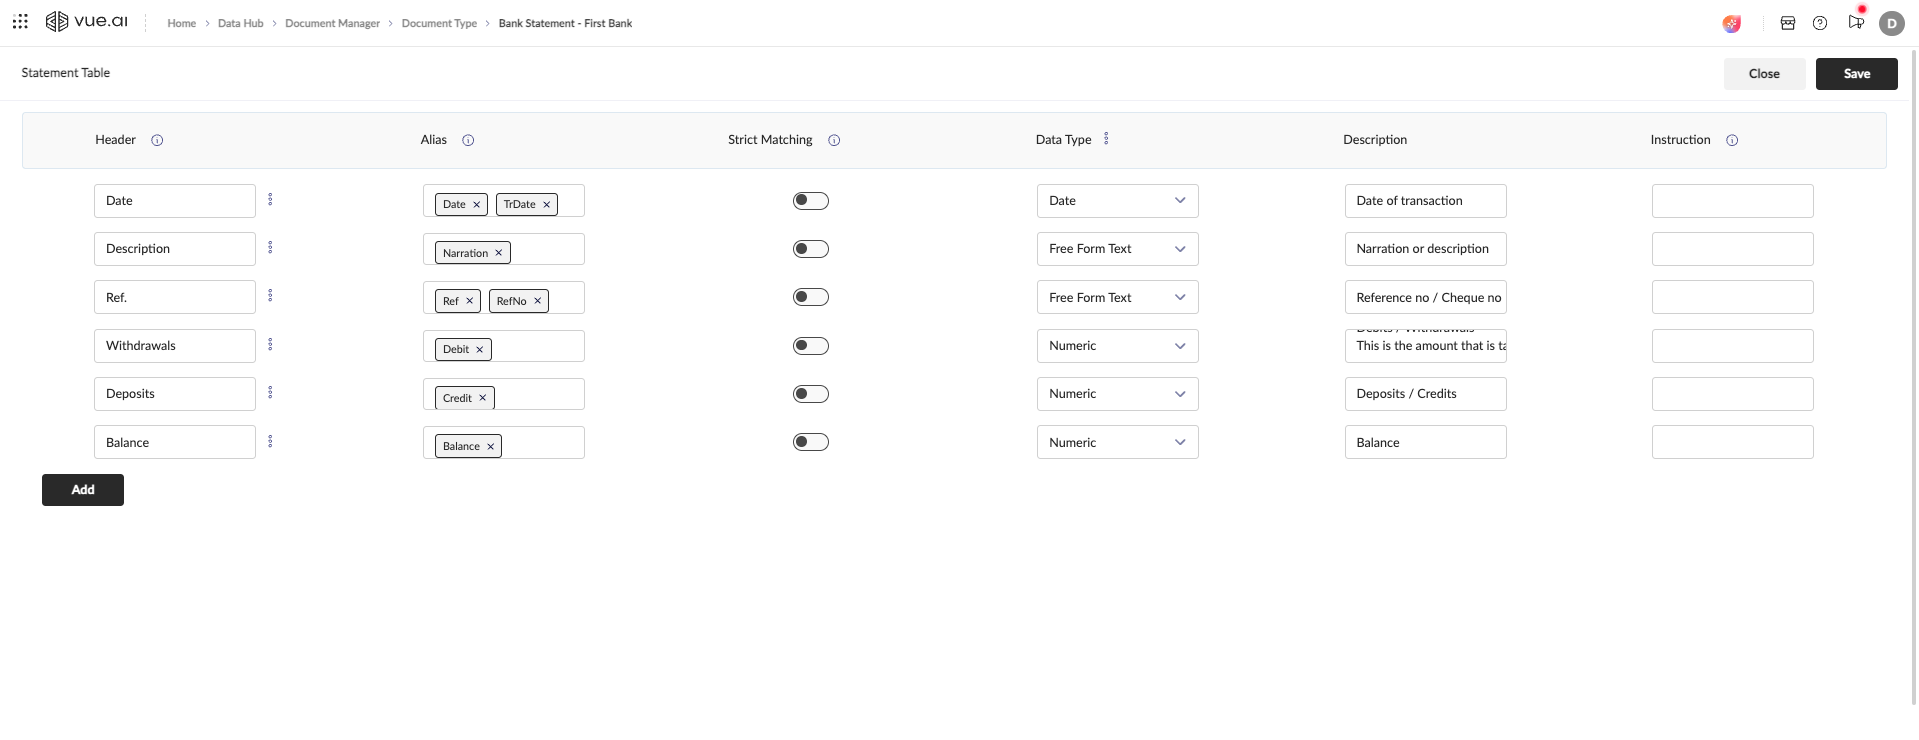
- Configure each column's Header, Alias, Data Type, and guidance. This standardizes your table output.
Step 5: Verify the Final Taxonomy and Extraction
- Review the Taxonomy tab for your finalized attribute list.
- Review the Document Extraction tab for correctness and formatting. Use tags for filtering where useful.
Step 6: Register the Document Type
- Click Register in the top-right.
- Status changes from
DrafttoRegistered.
All set
Your Document Type is now live and reusable for processing new documents of the same kind.